Posts Tagged ‘Sharepoint 2013’

Many times the companies need give access to external users (i.e. suppliers) to their own Intranet or Extranet application. The best solution in this case is not create users on the internal domain controller but use another alternative repository for store and manage the identities in order for maintain distinct the two worlds. In view of this you can:

  1. Create another domain controller
  2. Setup FBA (Form Based Authentication)
  3. Use an external provider like Azure Active Directory

Leaving the first point because I think that is not an elegant solution, usually I suggest to implement FBA because it is easy and it is quickly configurable on SharePoint but lately, if you have an subscription on Windows Azure, I encourage use Azure Active Directory through Access Control Namespace because it is on the cloud and opens many potential scenarios like give the possibility login with Google or Facebook Account.

I don’t want to write how to configure SharePoint with Azure AD because it is well explain on the TechNet article but I carry-over only the two differences that I done to permit to run the service correctly :

  • I didn’t create Azure AD Tenant Namespace but I created a new application under the my Azure Domain and I set Document Federation Metadata endpoint as URL Identity Provider;
  • I changed the lifetime of the SharePoint token without which I had a loop authentication between SharePoint and Azure. For this purpose I ran this PowerShell script:
$sts = Get-SPSecurityTokenServiceConfig
$sts.LogonTokenCacheExpirationWindow = (New-TimeSpan -minutes 1)
$sts.Update()
iisreset

Below you can see the my final result after I finished all setup:

  1. On Azure AD I create a new user accountAzureADForSharePoint1.png
  2. I give permission to access on SharePoint
    image.png
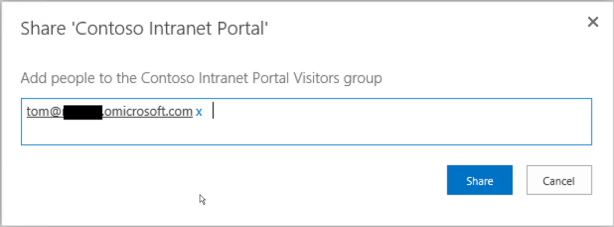
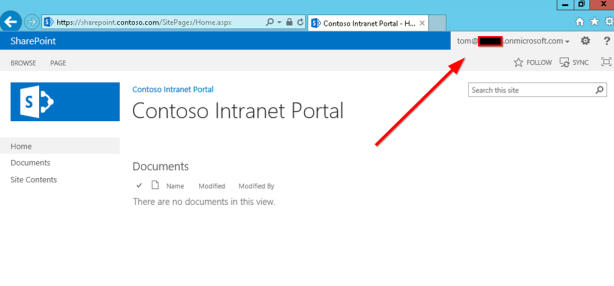
  3. I try access on SharePoint with Azure user account (tom@xxxx.onmicrosoft.com) but given that it’s the first access, user must change the temporary password
    image.png
  4. After login on Azure portal I am redirect on my SharePoint
    image.png
Some Considerations
  • I suggest do not use more than one authentication providers on same SharePoint zone because this solution implicate that user must select the correct provider during login operation
    image
  • If you can’t login for some issue, investigate with SharePoint logs
  • SharePoint People Picker can not resolve users on SAML authentication provider, to solve this inconvenience you can install a solution that fix this issue. An example is https://github.com/Yvand/AzureCP

Conclusion

I hope that with this post you can quickly implement Azure Active Directory authentication on your SharePoint and begin leverage the Cloud.


Simone F.

After you have migrated a Site Collection from 2010 to 2013 version, SharePoint show a message on the top of the page that invite to upgrade to SharePoint 2013 experience:

Upgrade

Even though it is advisable to upgrade the interface, not always is possible to do it, then it is recommended disable the option by PowerShell:

Get-SPSite http://webappurl | % {$_.AllowSelfServiceUpgrade = $false }

Simone F.

SharePoint 2013 display the date and time  for created and modified date in a friendly manner :

RelativeDate

If you need  the same approach on your custom control, add this line of code to show your data:

Microsoft.SharePoint.Utilities.SPRelativeDateTime.GetRelativeDateString(SPContext.Current.Web, DateTime.Now, [Date to Display]);

Is good practice on the production environment place inetpub directory on the different drive from system drive, for example on D:\. When you create a new SharePoint application you can specify which directory save  data but this require remember to change each time this directory. To avoid any inconvenience I suggest change the default parameter directely on regedit so when you create a new SharePoint Web Application, Central Admin will use by default this new directory. For this scope, open Regedit and locate this path HKEY_LOCAL_MACHINE\SOFTWARE\Microsoft\InetStp and change value of PathWWWRoot key with your new Path

image
Now when you create a new Web Application, SharePoint will use this new directory:

image

When you convert a SharePoint 2013 classic-mode web application to claims-based authentication, is important migrate all existing users, otherwise nobody can access to application. For this scope you have to launch this powershell script:

# configure the policy to enable the user to have full access:
$WebAppName = "http://yourWebAppUrl"
$wa = get-SPWebApplication $WebAppName
$account = "yourDomain\yourUser";
$account = (New-SPClaimsPrincipal -identity $account -identitytype 1).ToEncodedString()
$wa = get-SPWebApplication $WebAppName
$zp = $wa.ZonePolicies("Default")
$p = $zp.Add($account,"PSPolicy")
$fc=$wa.PolicyRoles.GetSpecialRole("FullControl")
$p.PolicyRoleBindings.Add($fc)
$wa.Update()
# perform user migration
$wa.MigrateUsers($true)
# perform provisioning
$wa.ProvisionGlobally()

When it has finished if before your account was in this format domain\AccountName after executed this script your account will be i:0#.w|domain\AccountName, I suggest to check UserInfo table, field tp_Login,  that all users have this new format.

Other thing that you must to do is update object cache user account: superuseraccount and superreaderaccount otherwise you could have an access denied when you try access on the application.

$wa.Properties["portalsuperuseraccount"] = "i:0#.w|domain\sp-superuser" 
$wa.Properties["portalsuperreaderaccount"] = "i:0#.w|domain\sp-superread"
$wa.Update()

Simone F.

With Sharepoint 2013 is not possible manage distribution Server for the Search service directly on the Central Admin like Sharepoint 2010, but now you have to use ManageShell.

For this scope I have two scripts that help me on this Job, one that permits move Search Service in the second server, if this one has been already created (MoveSearchService.ps1) and the other for create the search service directly on the second server, if this one is not created yet (CreateSearchService.ps1).

This scripts assume that you have the small server farm composed from 3 server: Front-end, Application Server, and Database Server. If you need to create a more complex farm you must change the code.

The result on the Central Admin after execute the script is this:

SearcApplicationTopology

Note that Search Service is installed on the first server while on the second, front-end server, there is only the Query Processing.

You can download this script from here

Simone F.